Your attic in a Texas summer can reach 150-160°F—that's hot enough to cook food. This superheated air radiates down into living spaces, forcing your AC to work overtime and literally cooking your roof from the inside.
Poor ventilation is one of the most overlooked factors in premature roof failure, excessive energy bills, and indoor comfort problems. Yet most homeowners never think about their attic ventilation until something goes wrong—shingles curling prematurely, ice dams forming (yes, even in Texas), or mold growing in the attic.
Proper roof ventilation is a system, not just a few vents scattered around. Getting it right reduces cooling costs by 10-15%, extends roof lifespan by 5-10 years, prevents moisture damage, and dramatically improves comfort.
This comprehensive guide covers everything Texas homeowners need to know: why ventilation matters specifically in our extreme climate, how much ventilation you actually need (calculated for your home), types of vents and which work best, installation considerations, and how to tell if your current system is failing. Schedule a professional inspection to have your ventilation system evaluated.
Why Ventilation Matters in Texas Heat
The Physics of Hot Attics
Radiant Heat Transfer:
- Sun heats roof surface → 160-180°F
- Heat transfers through shingles → 150-160°F attic
- Heat radiates down into home → 85-95°F ceiling
- AC struggles to maintain → 75°F indoor temp
The Problem: Your AC is trying to cool your home while your attic acts like a giant radiator heating it from above. It's like trying to keep an ice chest cold while sitting on a hot stove.
The Solution: Proper ventilation removes hot air as fast as it accumulates, keeping attic temps within 20-30°F of outdoor temp instead of 60-80°F above.
The Cost of Poor Ventilation
1. Energy Bills Skyrocket
Poorly Ventilated Attic:
- Attic temp: 150-160°F
- Heat transfer to home: Significant
- AC runtime: +30-50% vs properly ventilated
- Monthly cooling: $250-$400 (summer)
Properly Ventilated Attic:
- Attic temp: 110-120°F
- Heat transfer: Reduced by 40-60%
- AC runtime: Normal
- Monthly cooling: $170-$250 (summer)
Annual Savings: $500-$1,200 per year
2. Premature Roof Failure
Heat Damage to Shingles:
- Designed for surface temps up to 160°F
- Attic heat attacks from below
- Combined front-and-back heat exceeds tolerance
- Accelerates aging by 30-50%
Poor Ventilation:
- Roof lifespan: 15-18 years (vs 25-30 rated)
- Early granule loss
- Curling and brittleness
- Warranty potentially voided
Proper Ventilation:
- Full rated lifespan: 25-30 years
- Even aging
- Warranty protected
- Saves $12,000-$18,000 in early replacement
3. Moisture Problems
Even in dry Texas, moisture accumulates:
Sources:
- Bathroom exhaust (if improperly vented)
- Cooking steam rising
- Laundry dryer venting
- Human respiration (family of 4 = 3-4 gallons/day)
Without Ventilation:
- Moisture condenses on cold surfaces (winter)
- Mold and mildew growth
- Wood rot in roof decking
- Insulation degradation
- Health hazards
With Ventilation:
- Moisture expelled before condensing
- Dry attic year-round
- Structural integrity maintained
4. Comfort Issues
Second-Floor Bedrooms:
- Poor ventilation → unbearably hot
- AC can't keep up
- Sleep quality suffers
- Rooms farthest from AC worst
Proper Ventilation:
- Reduced radiant heat
- Comfortable temperatures
- Even cooling throughout home
Texas-Specific Ventilation Challenges
Extreme Heat (7+ Months/Year):
- Longer cooling season than most US regions
- Attics stay hot March-October
- Ventilation critical for 8 months
Hail and Wind:
- Ventilation openings must withstand storms
- Improperly rated vents = damage and leaks
- Must meet Texas wind zones
Humidity Variation:
- Coastal: High humidity (mold risk)
- Central: Moderate
- West: Dry (less moisture concern)
Solution: Ventilation system designed for YOUR specific location.
How Much Ventilation Do You Need?
The 1:150 Rule (Building Code Minimum)
Standard Calculation:
Formula: 1 square foot of net free ventilation area per 150 square feet of attic floor space
Example:
- Attic floor: 1,500 sq ft
- Required ventilation: 1,500 ÷ 150 = 10 sq ft
- Split: 5 sq ft intake (soffit) + 5 sq ft exhaust (ridge/gable)
'Net Free Area' = actual opening size after subtracting screen/louvers
The 1:300 Rule (With Vapor Barrier)
If you have:
- Continuous vapor barrier on attic floor
- Well-sealed ceiling penetrations
- Modern insulation with vapor barrier
Formula: 1 square foot per 300 square feet
Same Example:
- Attic floor: 1,500 sq ft
- Required: 1,500 ÷ 300 = 5 sq ft
- Split: 2.5 sq ft intake + 2.5 sq ft exhaust
Most Texas homes use 1:150 rule for safety margin in extreme heat.
Calculate Your Home's Requirements
Step 1: Measure Attic Floor Area
Simple Rectangular Home:
- Length × Width = Attic floor area
- Example: 50 ft × 30 ft = 1,500 sq ft
Complex Roof:
- Divide into rectangles
- Calculate each section
- Add together
Step 2: Calculate Total Ventilation Needed
Attic Floor Area ÷ 150 = Total Sq Ft Needed
Step 3: Split 50/50 Between Intake and Exhaust
- Intake (soffit vents): 50% of total
- Exhaust (ridge/gable/turbine): 50% of total
Example (1,500 sq ft attic):
- Total needed: 10 sq ft
- Intake: 5 sq ft (soffit vents)
- Exhaust: 5 sq ft (ridge vent)
Understanding Net Free Area (NFA)
Not All Vents Are Equal:
Vent Type → Net Free Area:
-
Louvered vent: 50-60% of gross area
- 12'×12' vent = 144 sq in gross
- NFA = 72-86 sq in (50-60%)
-
Screen-only vent: 80-90% of gross area
- Better airflow, less blockage
-
Ridge vent: Typically 18 sq in NFA per linear foot
- Check manufacturer spec
- Quality matters significantly
Always check manufacturer's NFA rating—it's marked on the product.
Austin-Area Specific Recommendations
Standard 2,000 Sq Ft Home:
- Attic floor: ~1,600 sq ft (accounting for walls)
- Minimum ventilation: 10.7 sq ft NFA
- Recommended (Texas heat): 13-15 sq ft NFA (25% above minimum)
Intake:
- Continuous soffit vents: Both sides
- 2-inch strip = ~8-9 sq in NFA per linear foot
- 100 linear feet = ~900 sq in (6.25 sq ft) NFA
Exhaust:
- Ridge vent: 40 feet @ 18 sq in/ft = 720 sq in (5 sq ft) NFA
- Or: 4-5 powered attic fans
- Or: Multiple turbine vents
Texas Best Practice: Err on side of more ventilation. Heat is your enemy.
Types of Exhaust Vents (Top of Roof)
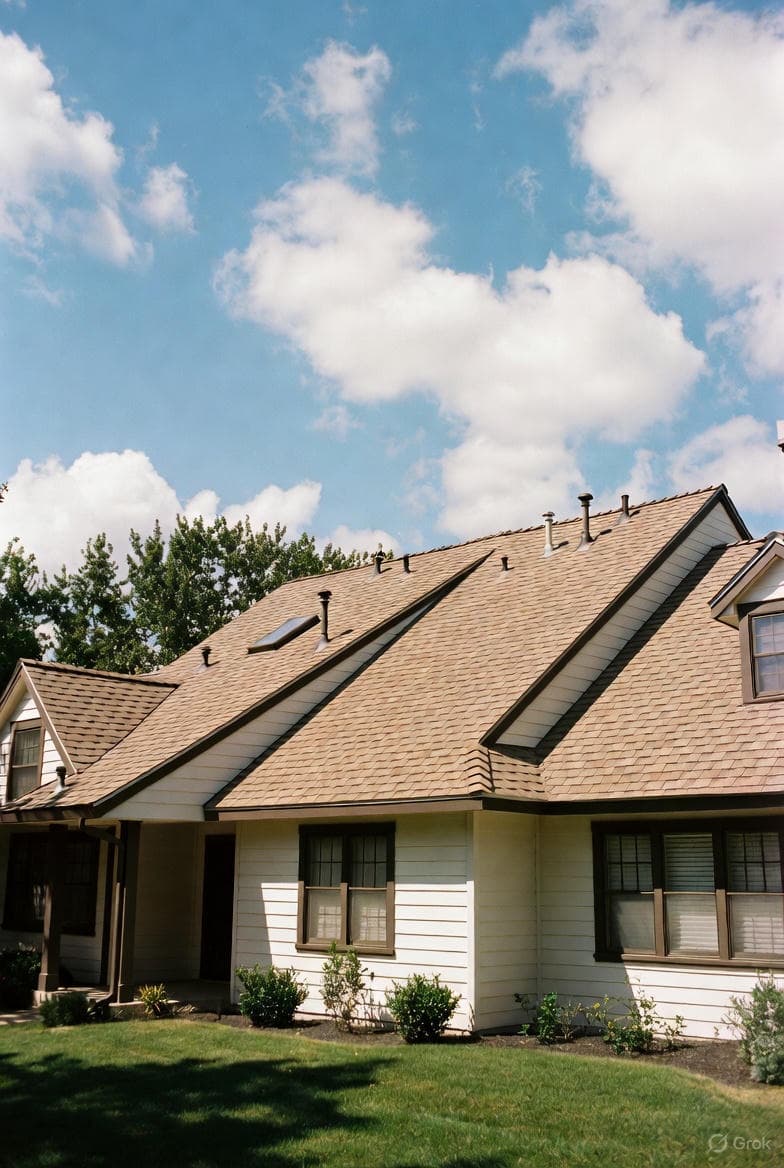
1. Ridge Vents ⭐ BEST FOR MOST HOMES
What They Are:
- Continuous vent along entire roof peak
- Low-profile, barely visible
- Shingles cover vent for aesthetics
- Full-length exhaust
Pros:
✓ Even air distribution (entire attic)
✓ No hot spots
✓ Most effective natural ventilation
✓ Aesthetically invisible
✓ No moving parts (no maintenance)
✓ Works with natural convection
Cons:
❌ Requires continuous ridge (some homes don't have)
❌ Must be properly installed (mistakes common)
❌ Doesn't work with hip roofs (no ridge line)
Net Free Area:
- Quality ridge vent: 18-20 sq in per linear foot
- 40-foot ridge: 720-800 sq in (5-5.5 sq ft) NFA
Cost:
- DIY: $3-$5 per linear foot materials
- Installed: $8-$15 per linear foot
- 40-foot ridge: $320-$600 installed
Best For:
- Homes with continuous ridgeline
- New construction
- Roof replacements
- Gable or A-frame roofs
Recommended Products:
- GAF Cobra Ridge Vent
- CertainTeed ShingleVent II
- Lomanco Ridge Vent
2. Turbine Vents (Whirlybirds)
What They Are:
- Spinning metal vents
- Wind-powered (no electricity)
- Visible on roof
Pros:
✓ No electricity needed
✓ More effective than static vents
✓ Work in light wind
✓ Relatively inexpensive
Cons:
❌ Visible (aesthetic concern)
❌ Moving parts wear out (5-15 year lifespan)
❌ Can be noisy (squeaking common)
❌ Less effective than ridge vents
❌ Require proper placement (multiple needed)
Net Free Area:
- 12-inch turbine: 50-70 sq in NFA
- Need 3-5 for typical home
Cost:
- DIY: $30-$60 each
- Installed: $150-$250 each
- 4 turbines: $600-$1,000 installed
Best For:
- Hip roofs (no ridge option)
- Budget-conscious projects
- Homes with good wind exposure
3. Powered Attic Fans (PAFs)
What They Are:
- Electric-powered exhaust fans
- Thermostat-controlled
- High airflow capacity
Pros:
✓ Powerful exhaust (1,000-1,600 CFM)
✓ Thermostat controlled (automated)
✓ Effective in still air
✓ Quick temperature reduction
Cons:
❌ Electricity cost ($5-$15/month)
❌ Maintenance required (motor, bearings)
❌ Can create negative pressure (pulls AC air into attic)
❌ Noise (40-60 dB)
❌ May not be code-compliant (some jurisdictions)
Net Free Area:
- Not applicable (powered, not passive)
- Airflow: 1,000-1,600 CFM typical
Cost:
- Unit: $100-$300
- Installed: $400-$800
- Operating: $60-$180/year
Best For:
- Homes with inadequate natural ventilation
- As supplement (not primary)
- Temporary solution
Controversy: Many building scientists recommend AGAINST powered attic fans due to negative pressure issues. Passive systems preferred.
4. Solar-Powered Attic Fans
What They Are:
- Fan powered by solar panel
- No electrical connection
- Thermostat-controlled
Pros:
✓ No operating cost
✓ Environmentally friendly
✓ No wiring needed
✓ Works when sun shining (peak heat)
Cons:
❌ High upfront cost ($400-$800)
❌ Same negative pressure concerns as PAFs
❌ Less powerful than electric (typically)
❌ Panel can fail or get dirty
Cost:
- Unit: $300-$600
- Installed: $600-$1,200
- Operating: $0
Best For:
- Remote locations
- Off-grid homes
- Environmental preference
5. Gable Vents (Passive)
What They Are:
- Vents on end walls (gable ends)
- Triangular or rectangular
- Passive airflow
Pros:
✓ Inexpensive
✓ Easy to install
✓ No roof penetration
Cons:
❌ Cross-ventilation only (not whole attic)
❌ Creates dead air zones
❌ Less effective than ridge vents
❌ Wind direction dependent
Net Free Area:
- 12'×18' vent: 100-120 sq in NFA
Cost:
- DIY: $15-$40 each
- Installed: $100-$200 each
Best For:
- Supplement to other systems
- Historic homes (aesthetic match)
- Budget constraints
Exhaust Vent Comparison
| Type | Effectiveness | Cost | Aesthetics | Maintenance | Best Use |
|---|---|---|---|---|---|
| Ridge Vent | ⭐⭐⭐⭐⭐ | $$$ | Excellent | None | Primary - Most homes |
| Turbine | ⭐⭐⭐ | $$ | Fair | Medium | Hip roofs |
| Powered Fan | ⭐⭐⭐⭐ | $$$$ | Fair | High | Supplement only |
| Solar Fan | ⭐⭐⭐ | $$$$ | Fair | Medium | Off-grid |
| Gable Vent | ⭐⭐ | $ | Good | None | Supplement |
Types of Intake Vents (Soffits/Eaves)
Intake is EQUALLY important as exhaust. Many homes have adequate exhaust but insufficient intake—system won't work.
1. Continuous Soffit Vents ⭐ BEST OPTION
What They Are:
- Perforated strip running entire soffit length
- Installed during siding/soffit work
- Nearly invisible
Pros:
✓ Even air distribution
✓ No dead zones
✓ Maximum intake area
✓ Aesthetically clean
✓ No maintenance
Cons:
❌ Requires soffit replacement (if retrofitting)
❌ More expensive upfront
❌ Must ensure not blocked by insulation
Net Free Area:
- 2-inch continuous: 8-9 sq in per linear foot
- 16-inch on-center perforated: 6-8 sq in per linear foot
Cost:
- Continuous strip: $2-$4 per linear foot
- Installed (with soffit): $6-$12 per linear foot
Best For:
- New construction
- Soffit replacement projects
- Optimal ventilation
2. Individual Soffit Vents
What They Are:
- Circular or rectangular vents
- Spaced every 3-4 feet
- Retrofit-friendly
Pros:
✓ Easy retrofit (cut holes, install)
✓ Inexpensive
✓ DIY-friendly
✓ No soffit replacement
Cons:
❌ Less total area than continuous
❌ More visible
❌ Labor-intensive (many small holes)
❌ Risk of improper spacing
Net Free Area:
- 4-inch round: 8-10 sq in each
- 8'×16' rectangle: 60-80 sq in each
Cost:
- Vents: $2-$8 each
- Installed: $15-$30 each
Best For:
- Retrofit projects
- Budget constraints
- DIY installation
3. Drip Edge Vents
What They Are:
- Ventilation strip at roof edge
- Replaces standard drip edge
- Slim profile
Pros:
✓ Works where no soffit exists
✓ Good for tight eaves
✓ Replaces existing drip edge
Cons:
❌ Lower NFA than soffit vents
❌ Requires roof edge work
❌ Not suitable as sole intake
Best For:
- Homes without soffits
- Supplement to other intake
Critical: Prevent Insulation Blocking
Common Problem:
- Blown-in insulation blocks soffit vents
- Reduces intake by 50-100%
- System fails
Solutions:
- Baffles/chutes: Cardboard or foam channels
- Install between rafters
- Keep 2-inch air channel clear
- $1-$3 each, every rafter bay
Without baffles, ventilation system is 50% effective at best.
Balanced Ventilation: The Key to Success
Why Balance Matters
Unbalanced System Problems:
Too Much Exhaust, Insufficient Intake:
- Creates negative pressure
- Pulls conditioned air from home into attic
- Increases energy bills
- Defeats purpose
Too Much Intake, Insufficient Exhaust:
- Hot air can't escape
- Attic overheats
- Minimal benefit
Proper Balance (50/50):
- Natural airflow established
- Cool air enters at soffit
- Hot air exits at ridge
- Continuous circulation
- Maximum efficiency
The Stack Effect
How Natural Ventilation Works:
- Hot air rises (physics)
- Exits through ridge vents (top)
- Creates slight negative pressure
- Draws cool air in through soffits (bottom)
- Cycle repeats continuously
This is passive, automatic, and costs nothing to operate.
Requirements for Stack Effect:
✓ Adequate intake (soffit)
✓ Adequate exhaust (ridge)
✓ Clear path between (no obstructions)
✓ Balanced 50/50 ratio
Measuring Your System
DIY Assessment:
Step 1: Count Existing Vents
- Note all exhaust vents (type, size)
- Note all intake vents
- Record locations
Step 2: Calculate NFA
- Look up manufacturer specs (or estimate)
- Multiply by number of vents
- Total intake NFA vs exhaust NFA
Step 3: Compare to Requirements
- Calculate needed (attic sq ft ÷ 150)
- Is actual close to needed?
- Is intake = exhaust?
Step 4: Assess Balance
- Intake ≈ Exhaust? Good.
- Intake < Exhaust? Add intake.
- Exhaust < Intake? Add exhaust.
Installation Considerations
DIY vs Professional Installation
DIY-Friendly Projects:
- Adding individual soffit vents
- Installing gable vents
- Replacing turbine vents
- Installing baffles in attic
Requires Professional:
- Ridge vent installation (roof work)
- Powered attic fans (electrical)
- Large-scale soffit replacement
- Structural modifications
Common Installation Mistakes
Mistake #1: Insulation Blocking Soffit Vents
- Solution: Install baffles/chutes, every rafter
Mistake #2: Mixing Vent Types Improperly
- Problem: Ridge vent + gable vents = short-circuit (air out gables, not through attic)
- Solution: Choose one exhaust type (ridge preferred)
Mistake #3: Inadequate Intake
- Problem: Focus on exhaust, forget intake
- Solution: 50/50 balance always
Mistake #4: Power Vents with Insufficient Intake
- Problem: Creates negative pressure
- Solution: Ensure intake exceeds exhaust draw
Mistake #5: Sealing Attic Too Much
- Problem: Air-sealing penetrations is good, but blocking soffit vents is bad
- Solution: Seal ceiling penetrations, never block vents
Ridge Vent Installation (Overview)
Professional Job—Don't DIY unless experienced:
Steps:
- Cut 2-inch strip along ridge (specialized saw)
- Install ridge vent product
- Cover with ridge cap shingles
- Seal properly to prevent leaks
Critical Details:
- Must cut through sheathing, not just shingles
- Proper nailing pattern essential
- Quality ridge vent product matters
- Weatherproofing critical
Cost: $8-$15 per linear foot installed
Payback: Energy savings + roof longevity = 3-7 years
Retrofit vs New Construction
New Construction:
- Plan ventilation from start
- Continuous soffit vents built-in
- Ridge vent standard
- Optimal system easy
Retrofit:
- Work with existing structure
- May require creative solutions
- Soffit access may be difficult
- Cost-benefit analysis needed
Retrofit Priority:
- Ensure soffit intake adequate (baffles + add vents)
- Upgrade exhaust (ridge vent if possible)
- Balance system
- Monitor results
Ventilation for Different Roof Types
Gable Roofs ⭐ EASIEST
Best System:
- Ridge vent (exhaust)
- Continuous soffit vents (intake)
- Natural balance
Alternative:
- Gable vents (exhaust) if no ridge
- Soffit vents (intake)
Hip Roofs
Challenge: No ridge line (or very short)
Best System:
- Multiple turbine vents or box vents
- Continuous soffit vents
- Calculate NFA carefully
Alternative:
- Powered attic fan (sized properly)
- Ensure sufficient intake
Flat or Low-Slope Roofs
Challenge: No natural stack effect
Best System:
- Mushroom vents or low-profile box vents
- Soffit intake (if present)
- May need powered assistance
Commercial:
- Mechanical ventilation often required
Complex Roofs
Multiple Ridges/Valleys:
- Ridge vent on each section
- Ensure intake under each section
- Avoid dead zones
Additions/Dormers:
- Ventilate each attic space separately
- Don't assume connected
- May need multiple systems
Moisture Control Benefits
Ventilation isn't just about heat—it's about moisture too.
Summer Moisture
Sources:
- AC condensation
- Bathroom/kitchen exhaust leaks
- Humid outdoor air
Problem:
- Humid air in hot attic condenses on cool AC ducts
- Drips onto insulation
- Mold growth
Solution:
- Ventilation removes humid air
- Keeps dew point below surface temps
- Dry attic year-round
Winter Moisture (Yes, in Texas)
Sources:
- Interior humidity rises into attic
- Cooking, showers, breathing
Problem:
- Cold attic surfaces (winter nights 30-40°F)
- Warm humid air condenses
- Wood rot, mold
Solution:
- Ventilation removes moisture before condensing
- Keeps attic temp close to outdoor
- Prevents condensation
Coastal Texas Considerations
High Humidity Year-Round:
- Greater moisture risk
- Mold more common
- Ventilation absolutely critical
Recommendations:
- 1:150 ratio minimum (not 1:300)
- Consider dehumidification
- Regular attic inspections
Energy Savings Breakdown
Cooling Cost Reduction
Typical Austin Home (2,000 sq ft):
Before Proper Ventilation:
- Attic temp: 150°F
- Ceiling temp: 95°F
- AC runtime: 18-20 hrs/day
- Monthly cost (July-Aug): $350-$450
After Proper Ventilation:
- Attic temp: 115°F
- Ceiling temp: 85°F
- AC runtime: 12-14 hrs/day
- Monthly cost (July-Aug): $240-$300
Monthly Savings: $100-$150 (summer)
Annual Savings: $600-$900
ROI Calculation
Ventilation Upgrade Cost:
- Ridge vent (40 ft): $600
- Additional soffit vents: $300
- Baffles: $150
- Total: $1,050
Annual Savings: $750
ROI: 1.4 years
Plus:
- Extended roof life: 5-10 years (value: $12,000-$18,000)
- Improved comfort: Priceless
- Reduced HVAC wear: $500-$1,000 saved
Total value: $13,000-$20,000 over roof life
Signs Your Ventilation is Inadequate
Check for These Warning Signs
Summer Indicators:
❌ Attic excessively hot (150°F+ with outdoor 95°F)
❌ Second floor rooms always hot
❌ AC runs constantly
❌ High electricity bills
❌ Shingles curling prematurely
Winter Indicators:
❌ Moisture on attic surfaces
❌ Mold or mildew smell
❌ Water stains on ceiling
❌ Frost on nails in attic (rare but possible)
Year-Round Indicators:
❌ Roof aging faster than expected
❌ Ice dams forming (in rare freezes)
❌ Rusted nails in attic
❌ Deteriorated insulation
❌ Visible insulation blocking soffit vents
DIY Attic Temperature Test
Hot Summer Day (95°F+ outside):
- Measure outdoor temp (shade)
- Enter attic at 3-4 PM (hottest time)
- Measure attic temp (center of attic)
- Calculate difference
Good Ventilation: Attic temp 20-30°F above outdoor
Acceptable: 30-40°F above
Poor: 50°F+ above
Example:
- Outdoor: 97°F
- Good attic: 117-127°F
- Poor attic: 147-157°F
If attic is 50°F+ above outdoor, ventilation inadequate.
Maintenance and Monitoring
Annual Inspection Checklist
Spring (March-April):
✓ Check all vents clear of debris
✓ Verify soffit vents not blocked (from inside attic)
✓ Ensure baffles still in place
✓ Look for moisture stains
✓ Check turbine vents spinning freely
Fall (October-November):
✓ Clear leaves from soffit vents
✓ Verify exhaust vents clear
✓ Check for wasp nests
✓ Test powered fans (if present)
✓ Inspect attic for moisture issues
Cleaning and Upkeep
Soffit Vents:
- Remove debris with vacuum or brush
- Check for paint blocking perforations
- 10-15 minutes annually
Ridge Vents:
- Visually inspect from ground
- Look for damage or blockage
- Professional inspection every 3-5 years
Turbine Vents:
- Lubricate moving parts annually
- Replace if squeaking or stuck
- Lifespan: 10-15 years
Powered Fans:
- Clean blades annually
- Check thermostat operation
- Replace motor every 10-15 years
Monitor Energy Bills
Track Monthly Usage:
- Note significant increases (may indicate ventilation failure)
- Compare year-over-year
- Summer usage most revealing
If bills suddenly increase:
- Check attic ventilation first
- Verify soffit vents not blocked
- Ensure exhaust vents functioning
- Consider professional assessment
Frequently Asked Questions
Q: Can I have too much ventilation? A: Practically, no. Oversized ventilation doesn't hurt (unlike oversized AC). More airflow = better in Texas heat. Balance intake/exhaust ratio still matters, but erring on side of more ventilation is fine.
Q: Should I close attic vents in winter? A: NO. Never close attic vents. Moisture control critical year-round. Even in Texas winters, need ventilation to prevent condensation. Unvented attics require completely different design.
Q: Do radiant barriers replace the need for ventilation? A: No. Radiant barriers reduce radiant heat transfer but don't remove hot air. Need both: radiant barrier + ventilation = maximum effectiveness. Ventilation is non-negotiable.
Q: My AC ducts are in the attic. Does ventilation help? A: Absolutely critical. Cool ducts in 150°F attic lose efficiency. Ventilation reduces attic temp, reducing heat gain to ducts. Can improve AC efficiency 15-20%.
Q: Can I mix ridge vents and gable vents? A: Not recommended. Creates short-circuit—air exits gable vents instead of traveling through attic. Choose one exhaust type. Ridge vent preferred; if using, block or remove gable vents.
Q: How do I know if my soffit vents are blocked? A: Enter attic during daytime. Look toward soffits—should see daylight through vent openings. If dark, insulation is blocking. Install baffles to clear.
Q: Are powered attic fans worth it? A: Controversial. Some HVAC pros say no due to negative pressure issues. If natural ventilation inadequate and can't be improved, may help. Ensure sufficient intake. Passive systems preferred.
Q: Does spray foam insulation eliminate need for ventilation? A: Closed-cell spray foam against roof deck creates 'unvented attic' system. Requires different approach—no ventilation but properly sealed. Must be designed correctly. Consult professional.
Your Ventilation Upgrade Action Plan
Step 1: Assess Current System (This Week)
Measure Attic Floor:
- Calculate square footage
- Determine ventilation requirement (÷ 150)
Inventory Existing Vents:
- Count exhaust vents (type, size)
- Count intake vents
- Calculate total NFA
Temperature Test:
- Hot afternoon, measure attic temp
- Compare to outdoor temp
-
30°F difference = needs improvement
Step 2: Identify Deficiencies (This Week)
Common Issues:
□ Insufficient exhaust area
□ Insufficient intake area
□ Unbalanced (exhaust ≠ intake)
□ Insulation blocking soffit vents
□ No ridge vent (but have ridge)
□ Turbine vents not spinning
Step 3: Plan Upgrades (Next Week)
Prioritize:
High Priority:
- Install baffles if soffit vents blocked (DIY: $100-$200)
- Add soffit vents if intake insufficient (DIY: $200-$400)
- Upgrade exhaust to ridge vent if possible (Pro: $600-$1,000)
Medium Priority: 4. Add turbine vents if ridge vent not option (DIY/Pro: $400-$800) 5. Install gable vents as supplement (DIY: $100-$300)
Get Quotes:
- Ridge vent installation
- Soffit vent installation (if complex)
- Compare DIY vs professional cost
Step 4: Execute (Next Month)
DIY Projects:
- Install baffles (weekend project)
- Add individual soffit vents (weekend)
- Install gable vents (weekend)
Professional Projects:
- Ridge vent installation (1-2 days)
- Continuous soffit vent installation (1-2 days)
Step 5: Monitor Results (Summer)
After Upgrade:
- Repeat temperature test
- Compare attic temps before/after
- Monitor energy bills
- Note comfort improvement
Expect:
- 30-40°F reduction in attic temp
- 10-20% reduction in cooling bills
- Noticeably cooler upstairs rooms
Get Professional Ventilation Assessment
Ripple Roofing & Construction provides comprehensive attic ventilation evaluations and upgrades.
Schedule Ventilation Assessment:
📞 Call (512) 763-5277
📧 Email tx@rippleroofs.com
🌐 Visit rippleroofs.com/estimate
Our Ventilation Service Includes:
- Complete attic and ventilation assessment
- NFA calculations for your specific home
- Temperature testing and analysis
- Ridge vent installation
- Soffit vent upgrades
- Balanced system design
Serving Round Rock, Austin, Georgetown, Cedar Park, Pflugerville, Leander, and all Central Texas.
Beat the Texas heat. Proper ventilation = lower bills, longer roof life, better comfort.