Emergency Roof Leak Repair Austin: 24/7 Service & What to Do Now
Water is dripping from your ceiling. Your heart sinks as you rush to place buckets under the leak, watching helplessly as water damages your home. Whether it's 2 AM after a violent thunderstorm or noon on a Saturday, a roof leak is a genuine emergency that demands immediate action.
In Austin, Texas, where we experience intense thunderstorms, hail events, and occasional flash flooding, roof leaks are one of the most common home emergencies. Every hour of delay allows more water to penetrate your home, causing progressively more expensive damage to ceilings, walls, insulation, and even your home's structural integrity.
This comprehensive guide covers everything Austin homeowners need to know about emergency roof leak repair: immediate steps to minimize damage, when to call for 24/7 emergency services, what to expect from emergency repairs, typical costs, insurance claim processes, and how to prevent future leaks.
If you have an active leak right now, skip to the 'Immediate Steps' section below. If you're researching for future reference or dealing with a recent leak, read on for complete information.
🚨 Immediate Steps: What to Do Right Now If Your Roof Is Leaking
If you're currently experiencing a roof leak, take these actions immediately to minimize damage while help is on the way:
Step 1: Contain the Water (First 5 Minutes)
Inside Your Home:
-
Place containers under all visible leak points
- Use buckets, trash cans, or large pots
- Place towels around containers to catch splashing
- If water is sheeting down a wall, hang a tarp or plastic to funnel water into containers
-
Move belongings away from the leak
- Furniture, electronics, valuables
- Remove items from wet areas entirely if possible
- Cover items you can't move with plastic tarps or garbage bags
-
Poke a hole in bulging ceiling sections
- Use a screwdriver or similar tool
- Puncture the center of a water-filled bulge
- Place a container underneath first
- Why: Controlled release prevents ceiling collapse and wider damage
-
Turn off electricity to affected areas
- Use the breaker box to cut power to rooms with active leaks
- Never touch electrical outlets or fixtures in wet areas
- If water is near your electrical panel, call an electrician immediately
-
Document everything with photos/video
- Take photos of the leak location
- Document water damage to ceilings, walls, floors
- Photograph damaged belongings
- Record video showing active water entry
- Critical for insurance claims
Step 2: Locate the Leak Source (Minutes 5-15)
From Inside:
- Trace water stains on ceiling to highest point
- Note: Water often travels along rafters/joists, so the ceiling stain may not be directly below the roof leak
- Check attic if safely accessible (bring flashlight)
- Look for wet insulation, water on rafters, daylight through roof
From Outside (only if safe):
- DO NOT go on the roof during active rain or storms
- Look from ground level with binoculars if possible
- Common leak sources visible from ground:
- Missing or damaged shingles
- Debris blocking valleys or gutters
- Obvious damage around chimneys, vents, or skylights
Step 3: Temporary Interior Protection (Minutes 15-30)
If you can access your attic safely:
-
Spread tarps over insulation under the leak
- Prevents insulation saturation (expensive to replace)
- Creates a water collection area
-
Place additional containers in attic to catch water
-
Move insulation away from the leak area if it's already saturated
- Wet insulation loses R-value and can harbor mold
- Lay it out to dry in a well-ventilated area
Dehumidification:
- Run dehumidifiers in affected rooms
- Open windows (if weather permits) for air circulation
- Use fans to promote drying
- Critical: Begin drying within 24-48 hours to prevent mold growth
Step 4: Call Emergency Roofing Services (Immediately)
Call a 24/7 emergency roofing company like Ripple Roofs:
Ripple Roofs Emergency Line: (512) 763-5277
- Available 24/7/365
- Average response time: 60-90 minutes in Austin metro
- Emergency tarping and temporary repairs
- Full damage assessment
- Insurance documentation assistance
What to tell the dispatcher:
- 'I have an active roof leak'
- Location of leak (room, area of home)
- Severity (dripping, streaming, multiple leaks)
- Cause if known (storm, hail, fallen branch)
- Your address and contact number
- Any safety concerns (electrical, structural)
Priority Service: Emergency leaks are prioritized over routine inspections and scheduled work. Expect a technician within 1-2 hours during business hours, 2-4 hours overnight.
Step 5: Contact Your Insurance Company (Within 24-48 Hours)
Start your claim as soon as possible:
-
Call your insurance company or file online
-
Provide:
- Policy number
- Date and time of incident
- Photos and video documentation
- Description of damage
- Emergency repairs performed (keep all receipts)
-
Ask about:
- Emergency repair coverage limits
- Whether you need approval before permanent repairs
- Adjuster visit timeline
- Advance payment for emergency services
Important: Most policies cover 'reasonable and necessary' emergency repairs to prevent further damage. Keep detailed receipts.
⚠️ SAFETY WARNING: When NOT to Handle This Yourself
Call professionals immediately without attempting any repairs if:
- ❌ Active thunderstorm or lightning
- ❌ Wet or icy roof surfaces
- ❌ Steep pitch (7/12 or steeper)
- ❌ Multiple stories (two-story or higher)
- ❌ Structural damage visible (sagging, holes)
- ❌ Electrical hazards present
- ❌ You're uncomfortable with heights
- ❌ You lack proper safety equipment
- ❌ Darkness (poor visibility)
Every year, homeowners are seriously injured or killed attempting DIY roof repairs in emergency situations. Your safety is more important than preventing water damage. Let professionals handle dangerous situations.
Understanding Emergency Roof Leaks: Common Causes in Austin
Knowing what causes emergency leaks helps you prevent them and respond appropriately.
1. Severe Thunderstorms & High Winds
Austin Storm Season: March through October, with peak activity May-September
How Storms Cause Leaks:
- Wind-driven rain: Pushes water under shingles, especially if shingles are lifting
- Wind damage: 60+ mph gusts lift or remove shingles entirely
- Debris impact: Branches, signs, or objects become projectiles that puncture roofs
- Structural stress: High winds can compromise flashing around penetrations
Typical Damage Pattern:
- Multiple shingles missing or displaced on windward side (usually south/southeast in Austin)
- Damaged valley flashing allowing water intrusion
- Lifted shingle edges creating water entry points
Emergency Response:
- Immediate tarping of exposed areas
- Temporary fastening of lifted shingles
- Debris removal
- Full inspection after storm passes
Recent Austin Example: The May 2024 derecho with 80+ mph winds caused thousands of emergency roof leak calls across Central Texas, with response times extending to 12-24 hours during the height of the event.
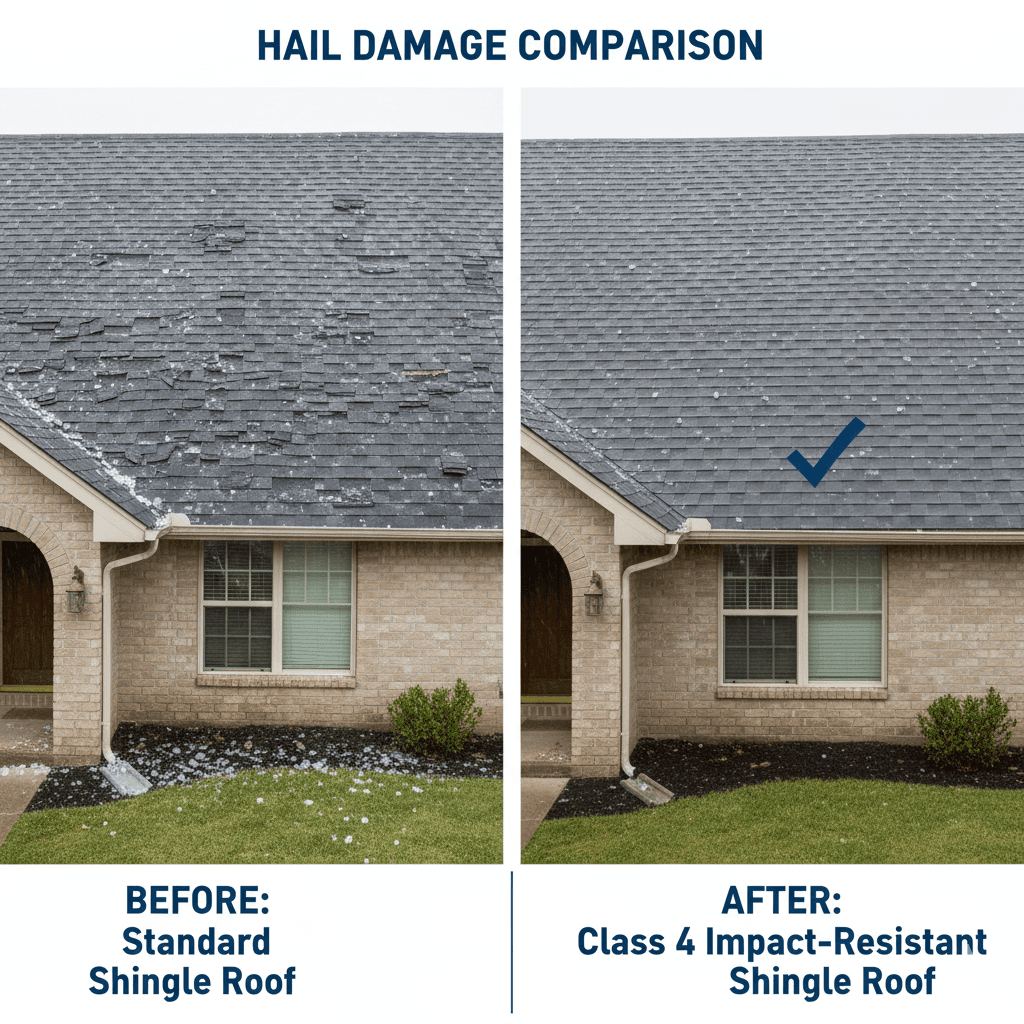
2. Hail Damage
Austin Hail Season: Peak in April-May (spring severe weather season)
Hail Sizes That Cause Leaks:
- 1-inch (quarter-size): Can damage aged shingles, may not cause immediate leaks
- 1.5-inch (ping pong ball): Significant damage, potential immediate leaks
- 2-inch+ (golf ball or larger): Severe damage, likely immediate leaks
How Hail Causes Leaks:
- Shingle fractures: Impact cracks allow water penetration
- Granule loss: Exposes asphalt layer to UV and water
- Denting/punctures: Penetrates underlayment in severe cases
- Flashing damage: Dents metal flashing, creating gaps
- Vent damage: Cracks plastic vents or damages vent collars
Delayed Leaks: Hail damage may not leak immediately but creates weak points that fail days, weeks, or months later during subsequent rains.
Emergency Response:
- Immediate tarping if punctures exist
- Documentation for insurance (hail damage often covered)
- Complete roof inspection (damage may be widespread)
- Temporary patching of penetrations
Insurance Note: Hail damage is typically covered under homeowners insurance in Texas. Most policies cover sudden, accidental damage from storms.
3. Flash Flooding & Excessive Rain
Austin Flash Flood Risk: High risk area, especially in Hill Country and along creeks
2018 Record: Some Austin areas received 10+ inches of rain in 24 hours
How Heavy Rain Causes Leaks:
- Overwhelmed drainage: Gutters overflow, causing water to back up under shingles
- Ponding water: Flat or low-slope areas retain water, finding weak points
- Saturated underlayment: Prolonged exposure allows water to wick through
- Valley failures: Excessive water volume overwhelms valley flashing
High-Risk Roof Types:
- Low-pitch roofs (3/12 or less)
- Roofs with inadequate valley design
- Homes with clogged gutters or downspouts
- Older roofs with compromised underlayment
Emergency Response:
- Clear gutters and downspouts if safely possible
- Redirect water away from foundation
- Tarp low-lying or ponding areas
- Interior water removal and drying
Prevention: Regular gutter cleaning and ensuring proper drainage is critical in Austin's flood-prone areas.
4. Fallen Trees & Large Branches
Austin Risk Factors:
- Mature tree canopy in established neighborhoods
- Thunderstorm downdrafts and microbursts
- Weakened trees from drought stress
- Ice storms (rare but devastating when they occur)
Damage Scenarios:
- Direct impact: Tree/branch punctures roof deck
- Scraping damage: Branches scrape across roof, removing shingles
- Debris accumulation: Leaves and small branches clog valleys and gutters
- Secondary wind damage: Trees block wind patterns, creating uplift
Emergency Response:
- Safety first: Don't approach if tree is on power lines
- Call utility company if power lines are involved
- Professional tree removal before roof repair
- Structural assessment if impact is significant
- Immediate tarping to prevent water entry
- Document extensively for insurance
Insurance Consideration: Tree damage is usually covered if caused by a covered peril (storm, wind). Damage from neglected/dead trees you should have removed may not be covered.
5. Ice Dams & Winter Weather (Rare but Severe)
Austin's Occasional Freeze Events: 2021 Winter Storm Uri (-2°F), 2023 winter storms
How Ice Dams Form:
- Heat escapes through roof, melting snow
- Meltwater flows to colder eaves
- Refreezes at eaves, creating dam
- Water backs up under shingles
- Water enters home through roof deck
Austin-Specific Challenge: Our homes aren't built for extended freezes, making ice dams more damaging when they occur.
Emergency Response:
- Remove snow from eaves if safely possible
- Create channels for water drainage
- Apply calcium chloride (not rock salt) to melt ice
- Interior water containment
- Professional ice removal for severe dams
Prevention: Proper attic insulation and ventilation prevents heat escape that causes ice dams.
6. Age-Related Failures During Rain
Common Scenario: An older roof that's been 'holding on' suddenly fails during a moderate rain event.
Failure Points:
- Deteriorated flashing: Rusted, cracked, or separated flashing around chimneys, vents, or skylights
- Brittle shingles: Loss of flexibility allows rain to penetrate
- Compromised valleys: Worn valley material fails during moderate rain
- Nail pops: Roofing nails back out, creating penetrations
- Underlayment breakdown: Deteriorated felt paper no longer waterproof
Warning Signs (before failure):
- Shingles curling or cupping
- Granule loss (bald spots)
- Visible cracking
- Rusted or separated flashing
- Interior stains (even if not actively leaking)
Emergency Response:
- Temporary patching or tarping
- Plan for full roof replacement soon
- Multiple age-related failures indicate systemic issues
Typical Timeline: Asphalt shingle roofs in Austin last 18-25 years. After 20 years, emergency leak risk increases significantly.
7. Installation Defects Revealed by Weather
Scenario: Recent roof installation develops leaks during first significant rain.
Common Installation Issues:
- Improper flashing: Not sealed correctly, wrong material, or missing entirely
- Inadequate underlayment: Missing, improperly overlapped, or wrong type
- Poor valley construction: Improper weaving or metal valley installation
- Incorrect shingle installation: Wrong nailing pattern, misaligned, or insufficient overlap
- Vent boot issues: Improper sealing around pipe penetrations
Red Flags:
- Leak occurs within months of roof installation
- Multiple leak points
- Leak corresponds with specific roof feature (valley, vent, chimney)
Emergency Response:
- Document thoroughly (this is a warranty issue)
- Contact original contractor immediately
- Get second opinion if contractor is unresponsive
- Temporary repairs to prevent damage
- Consider legal consultation if contractor won't address
Consumer Protection: In Texas, contractors must honor workmanship warranties. Most reputable contractors offer 5-10 year workmanship warranties.
Emergency Roof Repair Services: What to Expect
When you call an emergency roofing service, here's what the process typically looks like:
Initial Contact & Dispatch (0-15 minutes)
Information You'll Provide:
- Name and contact information
- Address and specific location of leak
- Nature of emergency (active leak, storm damage, etc.)
- Severity assessment
- Safety concerns
- Insurance information (if applicable)
What the Dispatcher Will Tell You:
- Estimated arrival time (typically 1-4 hours depending on time and weather)
- Technician name and phone number
- Approximate service call fee
- What to do while waiting
- Safety precautions
Priority Levels:
- Critical/Immediate: Active leaking with significant water entry, structural concerns, or safety hazards (1-2 hour response target)
- Urgent: Recent leak that's temporarily contained (2-4 hour response target)
- Priority: Leak discovered but not currently active, needs same-day service (4-8 hour response target)
Technician Arrival & Initial Assessment (15-30 minutes)
What the Technician Will Do:
-
Verify safety of work area
- Check for electrical hazards
- Assess structural stability
- Confirm weather conditions allow safe work
-
Locate leak source
- Interior inspection to trace water path
- Attic inspection if accessible
- Exterior inspection (may wait for daylight or weather break)
-
Assess damage extent
- Roof structure damage
- Interior damage (ceilings, walls, insulation)
- Affected areas and systems
-
Provide initial estimate
- Emergency repair costs
- Temporary vs. permanent repair options
- Timeline for each option
-
Discuss options with you
- Immediate temporary repairs to stop water entry
- Permanent repair scope and timing
- Insurance considerations
Cost Transparency: Reputable companies provide written estimates before beginning work, even for emergency services.
Emergency Temporary Repairs (1-4 hours)
Goal: Stop water entry immediately and prevent further damage until permanent repairs can be completed.
Common Temporary Repair Methods:
1. Emergency Tarping
- Heavy-duty waterproof tarps secured over damaged area
- Extends over ridge and down both sides for best protection
- Secured with 2x4 boards (never nails through tarp alone - creates leak points)
- Can protect roof for weeks or months if needed
When Used:
- Extensive damage requiring major repairs
- Weather conditions prevent immediate permanent repair
- Awaiting insurance adjuster inspection
- Homeowner needs time to arrange financing
Cost: $300-$800 depending on size and complexity Duration: Effective for 30-90 days with proper installation
2. Temporary Shingle Replacement
- Replace obviously missing or damaged shingles
- Quick installation to restore water barrier
- May not match existing shingles perfectly (cosmetic)
When Used:
- Limited shingle damage
- Permanent repairs scheduled within 1-2 weeks
- Budget constraints
Cost: $150-$400 for small areas Duration: Can last until permanent repairs scheduled
3. Emergency Flashing Repair
- Seal separated or damaged flashing with roofing cement
- Apply temporary metal patches
- Seal around chimneys, vents, or valleys
When Used:
- Flashing failure is leak source
- Quick fix until proper flashing replacement
- Prevents water entry immediately
Cost: $200-$500 Duration: 2-8 weeks (not a long-term solution)
4. Pipe Boot Sealing
- Apply roofing sealant around vent pipes
- Replace damaged rubber boots
- Quick fix for common leak points
When Used:
- Leak is clearly from vent pipe penetration
- Boot is cracked or separated
- Simple, immediate fix
Cost: $100-$250 per vent Duration: Can be permanent if done correctly
5. Valley Patching
- Apply roofing cement to valley cracks
- Install temporary metal patches
- Seal separation points
When Used:
- Valley leak identified
- Temporary measure until valley replacement
- Limited damage to valley material
Cost: $250-$600 Duration: 1-3 months typically
Documentation & Photography (30-45 minutes)
Why Documentation Matters:
- Insurance claim evidence
- Scope of work verification
- Before/after comparison
- Warranty documentation
What Gets Documented:
- Exterior damage (all angles)
- Close-ups of leak sources
- Interior water damage
- Attic damage if applicable
- Temporary repair work performed
- Surrounding areas (shows no pre-existing damage)
Typical Photo Count: 30-100+ photos for thorough documentation
Video: Many contractors now use video walkthroughs to narrate damage for insurance adjusters.
Your Copy: Request copies of all documentation for your insurance claim.
Insurance Coordination (Ongoing)
What Emergency Contractors Can Help With:
- Provide detailed damage reports
- Submit documentation directly to insurer (with your authorization)
- Meet with insurance adjuster on-site
- Explain necessary repairs to adjuster
- Provide supplemental estimates if needed
What Contractors CANNOT Do:
- Guarantee insurance will pay
- Waive your deductible (this is insurance fraud)
- Sign contracts contingent on insurance approval only
- Inflate estimates for insurance purposes
Best Practice: Choose contractors experienced with insurance claims who can communicate effectively with adjusters while maintaining ethical business practices.
Permanent Repair Planning (Day 2-7)
After emergency stabilization, permanent repair planning begins:
Steps:
- Complete damage assessment (often requires daylight and dry conditions)
- Detailed written estimate for permanent repairs
- Insurance adjuster inspection (coordinate timing)
- Compare estimates with insurance settlement
- Schedule permanent repairs (weather permitting)
- Arrange financing if out-of-pocket costs exist
Timeline Factors:
- Weather windows for safe work
- Material availability
- Contractor scheduling
- Insurance approval process
- Homeowner decision-making
Typical Permanent Repair Timeline:
- Simple repairs (few shingles): 1-5 days from approval
- Moderate repairs (section of roof): 1-2 weeks
- Major repairs (large damaged areas): 2-4 weeks
- Full replacement: 3-6 weeks
Emergency Roof Repair Costs in Austin (2025)
Understanding emergency repair costs helps you budget and evaluate estimates.
Emergency Service Call Fees
Service Call/Trip Charge: $150-$350
- Covers technician dispatch, assessment, and estimates
- Often waived if you proceed with repairs
- May be higher overnight (10 PM - 6 AM) or holidays
- Typically covers up to 1-2 hours on-site
What's Included:
- Technician travel to your location
- Leak source identification
- Damage assessment
- Written estimate
- Emergency mitigation recommendations
Temporary Emergency Repair Costs
Emergency Tarping:
- Small area (10x10 ft): $300-$500
- Medium area (20x20 ft): $500-$800
- Large area (30x30 ft or more): $800-$1,500
- Additional story height: +$100-$200 per story
- Difficult access: +$150-$300
Factors Affecting Cost:
- Size of damaged area
- Roof pitch (steeper = more expensive)
- Story height
- Time of day (overnight premium: +25-50%)
- Weather conditions during service
- Complexity of roof layout
Temporary Shingle Repair:
- 1-5 shingles: $150-$300
- 5-15 shingles: $300-$600
- 15-30 shingles: $600-$1,200
- Overnight service: +$100-$200
Flashing Emergency Seal:
- Single location (chimney, vent): $200-$400
- Multiple locations: $400-$800
- Valley emergency seal: $300-$600
Pipe Boot Repair:
- Per vent repair: $100-$200
- Multiple vents: $80-$150 per vent (volume discount)
Permanent Emergency Repair Costs
Shingle Replacement (Small Area):
- Up to 100 sq ft: $500-$1,200
- Includes: Remove damaged shingles, inspect/repair decking if needed, install new shingles, proper sealing
- Higher if custom/premium shingles required to match
Valley Replacement:
- Open metal valley: $800-$1,500 per valley
- Woven valley: $600-$1,200 per valley
- Includes: Remove old valley, inspect decking, install new underlayment, install new valley material
Flashing Replacement:
- Chimney flashing: $600-$1,200
- Vent pipe flashing: $150-$300 per vent
- Skylight flashing: $500-$1,000
- Wall flashing: $400-$800
Decking Repair:
- Replace 4x8 sheet OSB/plywood: $200-$400 per sheet
- Includes: Remove shingles, remove damaged decking, install new decking, reinstall shingles
Water Damage Repairs (often separate contractor):
- Ceiling repair/replacement: $300-$1,500 per area
- Drywall replacement: $2-$4 per sq ft
- Insulation replacement: $1.50-$3 per sq ft
- Mold remediation: $500-$6,000 depending on extent
Full Roof Replacement (After Severe Damage)
If damage is extensive or roof was nearing replacement anyway:
Austin Roof Replacement Costs (full home):
- 1,500 sq ft home: $8,000-$12,000
- 2,000 sq ft home: $10,000-$16,000
- 2,500 sq ft home: $13,000-$20,000
- 3,000 sq ft home: $15,000-$25,000+
Factors:
- Roofing material (architectural shingles, metal, tile)
- Pitch and complexity
- Number of penetrations
- Decking repairs needed
- Local labor rates
Insurance: Often covers replacement cost if storm damage is severe enough, minus your deductible.
Cost Comparison: Emergency vs. Planned Repair
Emergency Premium: Expect to pay 15-40% more for emergency repairs vs. planned, scheduled work:
Why Emergency Costs More:
- After-hours labor premiums (1.5x-2x regular rates)
- Rush service prioritization
- Weather-related challenges
- Material premium for immediate availability
- Inability to batch multiple jobs for efficiency
Example Comparison:
- Planned valley repair (scheduled 2 weeks out, good weather): $900
- Emergency valley repair (Saturday night, during storm): $1,350
Cost-Saving Strategy: If the leak is contained and temporary repairs are working, schedule permanent repairs for normal business hours when weather permits. You'll save significantly while still protecting your home.
Payment & Financing Options
Payment Timing:
- Emergency service fee: Due at time of service
- Temporary repairs: Usually due upon completion
- Permanent repairs: Typically 50% deposit, 50% upon completion (varies by contractor)
Payment Methods Accepted:
- Credit cards (Visa, Mastercard, Amex, Discover)
- Checks or money orders
- Cash
- Financing (see below)
- Insurance assignment of benefits (some contractors)
Financing for Emergency Repairs: Many contractors offer financing for emergency repairs:
- 0% APR for 6-18 months (for qualified buyers)
- Low-rate payment plans (4.99%-7.99% APR)
- Quick approval (often same-day)
- Minimums typically $1,000-$2,000
Ripple Roofs Emergency Financing: We understand emergencies are unplanned. We offer flexible financing options even for emergency repairs, with approvals in as little as 10 minutes.
Insurance Claims for Emergency Roof Leaks
Most homeowners insurance policies in Texas cover sudden, accidental damage from storms, but understanding the process is critical.
What's Typically Covered
Covered Perils (in standard HO-3 policies):
- ✅ Wind damage from storms
- ✅ Hail damage
- ✅ Fallen trees/branches (from storms)
- ✅ Fire or lightning
- ✅ Weight of ice/snow/sleet
- ✅ Sudden, accidental water damage
What's Usually NOT Covered:
- ❌ Gradual deterioration or wear-and-tear
- ❌ Lack of maintenance
- ❌ Damage from pests (birds, rodents, insects)
- ❌ Cosmetic damage (no functional impact)
- ❌ Roof over 20 years old (some policies limit or exclude)
Gray Areas (depends on policy and circumstances):
- 🟡 Wind-driven rain through existing gaps (may argue maintenance issue)
- 🟡 Ice dam damage (may be excluded in some policies)
- 🟡 Damage from old or dead trees you should have removed
Key Policy Terms:
- Replacement Cost Value (RCV): Pays to replace without depreciation
- Actual Cash Value (ACV): Pays replacement cost minus depreciation
- Deductible: Your out-of-pocket before insurance pays (typically $1,000-$5,000)
- Coverage Limit: Maximum the policy will pay for roof (may be separate limit)
How to File an Emergency Leak Claim
Step 1: Immediate Notification (Within 24-48 Hours)
Contact your insurance company:
- Call the claims phone number (on your policy or insurance card)
- OR file online through the insurer's website/app
- Available 24/7 for most major insurers
Information to Provide:
- Policy number
- Date and time of damage
- Cause of damage (storm, hail, etc.)
- Description of damage
- Whether emergency repairs were needed
- Current condition of property
What They'll Tell You:
- Your claim number (write this down)
- Deductible amount
- Next steps (adjuster assignment)
- Whether emergency repairs are pre-approved
- Documentation needed
Step 2: Document Everything
Photos/Video (Take Immediately):
- Exterior damage from multiple angles
- Close-ups of specific damage (missing shingles, holes, etc.)
- Interior water damage
- Damaged belongings
- Overall roof condition
- Surrounding property (to show storm impact)
Keep Records Of:
- Date and time damage occurred
- Weather conditions (screenshots of weather reports)
- Emergency repair invoices and receipts
- Temporary housing expenses if home is uninhabitable
- Communication with insurance company (dates, times, names)
Detailed Written Description:
- Timeline of events
- What you heard/saw during the event
- Water entry points
- Actions taken to mitigate damage
Step 3: Emergency Repairs & Mitigation
Your Duty to Mitigate: Texas law and insurance policies require you to take reasonable steps to prevent further damage.
Covered Emergency Actions:
- Tarping roof to stop water entry
- Water extraction and drying
- Emergency board-up if needed
- Temporary repairs to prevent additional damage
Cost Coverage:
- Most policies cover 'reasonable and necessary' emergency repairs
- Keep detailed receipts
- Some policies have sub-limits for emergency repairs ($5,000-$10,000 typical)
Get Approval: While emergency mitigation is generally covered, call your insurer first if possible to confirm coverage for specific actions.
**Step 4: Adjuster Inspection
Adjuster Assignment (typically 3-7 days, faster for emergencies):
- Insurance company assigns an adjuster
- Adjuster contacts you to schedule inspection
- During major catastrophes, may take 1-2 weeks
Types of Adjusters:
- Staff adjuster: Employee of insurance company
- Independent adjuster: Contracted by insurance company
- Public adjuster: Hired by YOU (advocate for your interests, typically 10-15% of settlement)
Inspection Process (60-90 minutes):
- Adjuster examines exterior damage
- Reviews interior damage
- Checks attic if accessible
- Takes measurements and photos
- Reviews your documentation
- Discusses preliminary findings
Having Your Contractor Present:
- Highly recommended
- Contractor can point out all damage
- Explain repair scope
- Answer technical questions
- Advocate for necessary repairs
What Happens After Inspection:
- Adjuster prepares damage estimate
- Report submitted to insurance company
- You receive settlement offer (typically 7-14 days after inspection)
Step 5: Settlement & Repairs
Settlement Offer Includes:
- Scope of repairs
- Cost estimate (line-item breakdown)
- Depreciation withheld (if ACV policy)
- Less your deductible
- Additional living expenses if applicable
Settlement Payment Structure (RCV policies):
- Initial payment: Actual Cash Value (RCV minus depreciation and deductible)
- Final payment: Depreciation holdback (paid after repairs completed)
Example:
- Total damage: $12,000 (RCV)
- Depreciation: -$2,000
- Your deductible: -$2,500
- Initial check: $7,500
- After completion: $2,000 (depreciation recovered)
- Total received: $9,500 (your out-of-pocket: $2,500 deductible)
What if Settlement is Too Low?
Options:
- Request re-inspection - Point out missed damage
- Get independent contractor estimate - Show insurance their estimate is low
- Hire public adjuster - Professional claim advocate
- Invoke appraisal clause - Policy provision for neutral third-party assessment
- Legal consultation - For significant disputes
Texas Department of Insurance: File complaint if insurer is acting in bad faith (1-800-252-3439 or tdi.texas.gov)
Common Insurance Claim Challenges
Challenge 1: 'This is Wear and Tear, Not Storm Damage'
How to Combat:
- Provide photos showing pre-event condition (if available)
- Weather reports proving severe conditions
- Contractor expert opinion letter
- Neighboring homes with similar damage (shows storm impact)
Challenge 2: 'We Only Cover Patching, Not Full Replacement'
Response:
- Matching shingles unavailable (manufacturer discontinuation common)
- Local building codes may require more extensive repairs
- One section replacement looks patchwork (diminished value argument)
Challenge 3: 'Your Roof is Too Old for Full Coverage'
Context:
- Some policies limit coverage on roofs 15-20+ years old
- May only pay ACV (heavily depreciated)
- May have separate lower limits for old roofs
Options:
- Review policy carefully for actual exclusions
- Consider whether claim is worthwhile given limited payout
- Negotiate with insurer
- State insurance regulator complaint if policy language is unclear
Challenge 4: Claim Denial
Common Denial Reasons:
- 'No covered peril found' (adjuster didn't see storm damage)
- 'Pre-existing condition'
- 'Maintenance issue'
- 'Cosmetic damage only'
Steps to Contest:
- Request detailed denial letter in writing with policy provision cited
- Hire independent roofing expert for second opinion
- Get public adjuster to re-assess
- File formal appeal with insurance company
- Contact Texas Department of Insurance
- Consult attorney specializing in insurance claims
Working with Contractors on Insurance Claims
Best Practices:
✅ Choose contractor experienced with insurance claims
- Understands documentation requirements
- Can communicate effectively with adjusters
- Knows how to supplement for missed damage
✅ Get independent estimate before filing claim
- Helps you understand true scope
- Provides comparison to adjuster's estimate
- Some contractors provide free estimates specifically for insurance purposes
✅ Have contractor present during adjuster inspection
- Points out all damage
- Ensures nothing is missed
- Professional assessment carries weight
✅ Review contractor and adjuster estimates together
- Line-item comparison
- Identify discrepancies
- Prepare supplement for items adjuster missed
Red Flags (Contractors to Avoid):
❌ 'We'll waive your deductible'
- This is insurance fraud
- You may be liable for participating
❌ 'Sign with us and we'll get your claim approved'
- No contractor can guarantee approval
- Creates conflict of interest
❌ 'We work directly for the insurance company'
- Creates confusion about who they represent
- May not advocate strongly for you
❌ Pressure to sign before insurance adjuster visits
- You need flexibility during the claim process
- Rushing rarely benefits homeowner
Ripple Roofs Approach: We provide free inspections for potential insurance claims, detailed documentation, and expert advocacy during the adjuster inspection - but we never pressure you to sign before you're ready and fully informed.
Preventing Future Emergency Leaks
While some emergencies are unavoidable (severe storms), many leaks can be prevented with proper maintenance.
Regular Roof Inspections
Recommended Frequency:
- Annual professional inspection: Every 12 months
- Semi-annual homeowner inspection: Spring and fall
- Post-storm inspection: After any severe weather event
What Professional Inspections Include:
- Complete exterior shingle assessment
- Flashing condition evaluation
- Valley inspection
- Vent and penetration checks
- Gutter and drainage assessment
- Attic ventilation review
- Interior inspection for water stains
- Detailed photo documentation
- Written report with recommendations
Cost: $150-$400 for professional inspection (many contractors offer free inspections if you commit to needed repairs)
DIY Inspection (from ground level with binoculars):
- Missing or damaged shingles
- Lifted shingle edges
- Debris accumulation in valleys
- Clogged gutters
- Damaged flashing around chimneys and vents
- Moss or algae growth
- Sagging areas
Preventive Maintenance Schedule
Spring (March-April):
- Professional inspection after winter
- Clean gutters and downspouts
- Trim overhanging branches
- Check and repair any winter damage
- Ensure attic ventilation is functioning
Summer (July-August):
- Check for shingle damage from heat
- Inspect and clean gutters again
- Look for signs of wildlife entry
- Ensure AC condensate drain isn't overflowing near roof penetrations
Fall (October-November):
- Pre-winter inspection
- Clean gutters thoroughly (falling leaves)
- Check flashing before winter rains
- Seal any small gaps or cracks
- Ensure drainage is working properly
After Storms:
- Visual inspection from ground
- Look for obvious damage
- Check attic for water intrusion
- Schedule professional inspection if severe storm
High-Risk Areas to Monitor
1. Valleys:
- Most common leak source
- Water concentrates here during rain
- Check for rust, cracks, or separation
- Action: Re-seal or replace proactively if showing age
2. Flashing (Chimneys, Vents, Walls):
- Second most common leak source
- Sealant deteriorates over time
- Metal can rust or separate
- Action: Re-seal every 5-7 years, replace if damaged
3. Pipe Boot Collars:
- Rubber deteriorates in Austin's heat and UV
- Cracks allow water entry around plumbing vents
- Action: Replace boots every 10-15 years or when cracked
4. Skylights:
- Complex flashing prone to leaks
- Seals degrade over time
- Condensation can be mistaken for leaks
- Action: Inspect flashing annually, re-seal every 5-10 years
5. Roof-Wall Intersections:
- Where roof meets vertical wall
- Flashing critical here
- Common in additions or multi-level homes
- Action: Monitor for separation, re-seal as needed
6. Eaves and Overhangs:
- Ice dam risk area (rare in Austin but possible)
- Wind-driven rain can enter here
- Fascia and soffit can rot if gutters overflow
- Action: Keep gutters clean, ensure proper sealing
Gutter Maintenance (Critical in Austin)
Why Gutters Matter for Roof Leaks:
- Clogged gutters cause water backup under shingles
- Overflow leads to fascia rot and leak entry points
- Poor drainage directs water into vulnerable areas
Austin-Specific Challenge: Live oak, cedar elm, and pecan trees drop debris year-round, not just in fall.
Cleaning Frequency:
- Minimum: Twice per year (spring and fall)
- Recommended: Quarterly if you have trees
- After storms: Check for debris accumulation
Signs Gutters Need Cleaning:
- Visible debris or plant growth
- Water overflowing during rain
- Sagging gutter sections
- Staining on siding below gutters
- Water pooling at foundation
Gutter Guard Options:
- Screen guards: $1-$3 per linear foot
- Micro-mesh guards: $3-$6 per linear foot
- Reduces cleaning frequency but doesn't eliminate it
Tree Management
Overhanging Branches:
- Trim branches 6-10 feet away from roof
- Prevents debris accumulation
- Reduces wildlife access
- Prevents scraping damage during wind
- Reduces moss/algae growth (shaded, damp conditions promote growth)
Dead or Diseased Trees:
- Remove before they become hazards
- Austin's drought stress weakens trees
- Storm winds can topple stressed trees
Professional Arborist: Consult certified arborist for trees near your home. Cost: $75-$150 for assessment, $300-$3,000+ for tree removal depending on size.
Attic Ventilation & Insulation
Why It Matters for Leak Prevention:
- Proper ventilation reduces heat buildup (prolongs shingle life)
- Reduces moisture accumulation (prevents mold, wood rot)
- Balanced intake/exhaust prevents wind-driven rain entry through vents
Austin Challenge: Summer attic temperatures can reach 150°F+, accelerating roof aging.
Recommended Ventilation:
- 1 sq ft of net free ventilation per 150 sq ft of attic space
- Balance between intake (soffit vents) and exhaust (ridge or roof vents)
Inspection Points:
- Check vents aren't blocked by insulation
- Ensure soffit vents are clear
- Look for moisture or mold in attic (sign of poor ventilation)
- Verify insulation isn't compressed or wet
Upgrades to Consider:
- Ridge vent installation: $3-$7 per linear foot
- Attic fan installation: $300-$700
- Insulation upgrade: $1.50-$3.50 per sq ft
Proactive Repairs
'Fix it Before it Breaks' Philosophy:
Don't wait for leaks to address these issues:
Replace When You See:
- Cracked or brittle flashing → Replace: $400-$1,200
- Deteriorated pipe boots → Replace: $150-$300 each
- Loose or lifting shingles → Re-secure/replace: $200-$600
- Rusted valley material → Replace valley: $800-$1,500
- Separated chimney flashing → Re-flash: $600-$1,200
Cost Comparison:
- Proactive pipe boot replacement: $200 (30 minutes of work)
- Emergency leak repair from failed boot: $350 service call + $200 boot + $800 interior ceiling repair = $1,350
Proactive maintenance saves 3-5x the cost of emergency repairs.
Know Your Roof's Age & Expected Lifespan
Asphalt Shingle Lifespan in Austin:
- 3-tab shingles: 15-20 years
- Architectural shingles: 20-25 years
- Designer/premium shingles: 25-30 years
- Impact-resistant shingles: 25-30 years
When to Plan Replacement:
- At 75% of expected life: Begin annual inspections
- At 85% of expected life: Start budgeting for replacement
- At 90%+ of expected life: Plan replacement within 1-2 years
Example: 20-year-old roof with 25-year expected life:
- 80% of expected life
- Increase inspection frequency
- Budget for replacement in 2-3 years
- Don't be surprised by emergency repairs in the meantime
Proactive replacement at 20-23 years is often better than waiting for catastrophic failure at 25+ years that causes interior damage.
Finding Reliable 24/7 Emergency Roofing Services in Austin
When an emergency strikes, you need to know who to call. Here's how to find trustworthy help:
Pre-Emergency Planning: Research NOW
Don't wait for an emergency to research contractors. Have contact information ready:
Research Checklist:
- Identify 2-3 reputable roofing companies that offer 24/7 emergency service
- Save their phone numbers in your phone
- Post emergency numbers on your refrigerator
- Give list to family members
Ripple Roofs Emergency Line: (512) 763-5277 (Save This Now)
What to Look For in Emergency Contractors
Must-Haves:
- ✅ Licensed & insured: Texas requires roofing contractors to register (verify at RRC.texas.gov)
- ✅ Available 24/7: True emergency service, not just 'call us and we'll schedule you'
- ✅ Local: Austin-based companies respond faster than out-of-area contractors
- ✅ Established reputation: In business 5+ years with verifiable reviews
- ✅ Transparent pricing: Provide estimates before work begins
Bonus Qualifications:
- ⭐ CertainTeed ShingleMaster Premier or similar manufacturer certification
- ⭐ 5.0/5 Stars on Google
- ⭐ Angi/HomeAdvisor screened and approved
- ⭐ Professional memberships (NTRCA, RCAT)
- ⭐ Insurance claim experience
Red Flags: Contractors to Avoid
Immediate Disqualifiers:
❌ 'Storm chasers' who go door-to-door after storms
- Often out-of-state companies
- No local presence for warranty issues
- May deliver substandard work and disappear
❌ Cash-only, no receipt contractors
- Can't verify for insurance
- No documentation trail
- May not have proper licensing/insurance
❌ Demand full payment upfront
- Industry standard: Deposit (25-50%), balance on completion
- Full upfront payment is massive red flag
❌ High-pressure sales tactics
- 'Sign now or we can't help you'
- 'This price is only good for the next hour'
- 'We'll pay your deductible if you sign today' (insurance fraud)
❌ No physical address or verifiable business
- PO Box only
- Out-of-state address
- Disconnected phone after a few months
❌ Unwilling to provide references or insurance certificate
- Legitimate contractors gladly provide references
- Insurance certificate should be standard
Verifying Contractor Credentials
Texas Residential Roofing Contractor Registration:
- Required for all residential roofing contractors
- Verify at: RRC.texas.gov
- Search by company name or registration number
Insurance Verification:
- Request Certificate of Insurance (COI)
- Should show general liability ($1M+ recommended)
- Should show workers' compensation insurance
- Call insurance company to verify active policy
Better Business Bureau (bbb.org):
- Check complaint history
- Review complaint resolution
- Look for patterns of issues
Online Reviews:
- Google Reviews: Look for 4.5+ stars with 50+ reviews
- Yelp: Filter for emergency service mentions
- Facebook: Check comments and interactions
- Angi/HomeAdvisor: Verified reviews
Local References:
- Ask neighbors who they've used
- Austin neighborhood Facebook groups
- Nextdoor.com community recommendations
Questions to Ask Before Hiring
Before They Arrive:
- 'Are you available to come now?' (verify true 24/7 service)
- 'What is your service call fee?' (transparency)
- 'Do you handle insurance claims?' (if applicable)
- 'Are you licensed and insured?' (required)
When They Arrive:
- 'Can I see your license and insurance?' (verify credentials)
- 'What will emergency repairs cost?' (get written estimate)
- 'How long will temporary repairs last?' (set expectations)
- 'What is included in your estimate?' (clarity)
- 'When can permanent repairs be completed?' (planning)
- 'Do you offer financing?' (if needed)
- 'What warranty do you provide?' (protection)
Red Flag Responses:
- Vague or evasive answers
- Refusal to provide written estimates
- Pressure to decide immediately
- Can't or won't show credentials
Payment Protection
Safe Payment Practices:
- ✅ Use credit cards when possible (chargeback protection)
- ✅ Get itemized written contract before paying
- ✅ Never pay 100% upfront
- ✅ Keep detailed receipts for everything
- ✅ Verify work completion before final payment
Payment Schedule:
- Deposit: 25-50% to schedule work or order materials
- Progress payment: 25-35% at project mid-point (for larger jobs)
- Final payment: 25-50% upon satisfactory completion
For emergency repairs specifically:
- Service call fee: Due at time of service
- Emergency temporary repairs: Often due upon completion (smaller amounts)
- Permanent repairs: Follow standard payment schedule above
Special Situations: Emergency Roof Repairs
Multi-Unit Properties (Apartments, Condos)
Who's Responsible:
- Condos: HOA typically responsible for roof, individual units for interior damage
- Apartments: Property owner/management responsible
Tenant Actions:
- Notify property management immediately (emergency line)
- Document damage for your renter's insurance
- Take reasonable steps to protect belongings
- If management is unresponsive, contact local tenant advocacy groups
Property Management Best Practices:
- Have 24/7 emergency roofing contractor relationship established
- Maintain emergency repair fund
- Communicate promptly with affected tenants
- Document thoroughly for insurance
Historic Homes in Austin
Special Considerations:
- May require historic district approval for repairs
- Matching materials can be challenging and expensive
- Some techniques may be required to maintain historic integrity
Austin Historic Landmarks:
- Contact: (512) 974-2787
- May need Certificate of Appropriateness for repairs
- Emergency stabilization usually permitted without advance approval
Finding Contractors:
- Look for experience with historic properties
- Ask for references from other historic homes
- Expect higher costs for specialty materials
Solar Panel Complications
With Solar Panels Installed:
- Panels may need to be temporarily removed to access leak
- Removal/reinstallation: $1,000-$3,000
- Only certified solar contractors should remove panels
- Roof warranty may be affected
Emergency Coordination:
- Contact roofing contractor for leak assessment
- Contact solar company for panel removal if necessary
- Coordinate timing between contractors
- Ensure solar system is properly shut down before roofing work
Cost Responsibility:
- If solar installation caused leak: Solar company responsible
- If roof failure unrelated to solar: Homeowner responsible for both roof repair and panel removal/reinstallation
Commercial Properties
Commercial Emergency Roof Leaks:
- Often larger scale and more complex
- May require multiple crews
- Business interruption considerations
- Different insurance policies (commercial property)
Business Owner Actions:
- Ensure employee and customer safety first
- Protect inventory and equipment
- Call emergency roofing contractor experienced with commercial properties
- Notify insurance company
- Document business interruption for potential insurance claim
Ripple Roofs Commercial Services: We handle commercial emergency repairs throughout Central Texas. Call (512) 763-5277 for immediate commercial emergency assistance.
Conclusion: Be Prepared, Act Fast, Choose Wisely
Emergency roof leaks are stressful, but with the right knowledge and rapid response, you can minimize damage and costs.
Key Takeaways:
- ✅ Act immediately when you discover a leak - every minute matters
- ✅ Document everything with photos and video for insurance
- ✅ Call professionals for 24/7 emergency service - don't attempt dangerous repairs yourself
- ✅ Understand costs so you're not surprised by emergency repair pricing
- ✅ Know your insurance policy and claim process before you need it
- ✅ Prevent future emergencies with regular maintenance and inspections
- ✅ Research contractors now so you know who to call in an emergency
Your Emergency Action Plan:
📋 Before an Emergency:
- Save emergency roofing contractor numbers in your phone
- Review your homeowners insurance policy (coverage, deductible, process)
- Schedule annual roof inspections
- Keep gutters clean and trees trimmed
- Know your roof's age and condition
🚨 During an Emergency:
- Contain water inside your home
- Document damage with photos/video
- Call emergency roofing contractor
- Call insurance company within 24-48 hours
- Take reasonable steps to prevent further damage
🔧 After an Emergency:
- Get permanent repair estimates
- Work with insurance adjuster
- Choose reputable contractor for permanent repairs
- Update your emergency preparedness plan based on lessons learned
Your Austin Emergency Roofing Partner: Ripple Roofs
When disaster strikes your roof, you need a team you can trust - day or night.
Ripple Roofs Emergency Services:
- ☎️ 24/7 Emergency Line: (512) 763-5277
- ⚡ Rapid Response: 60-90 minute average response time in Austin metro
- 🛡️ Licensed & Insured: $2M liability, fully licensed Texas contractors
- 🏆 CertainTeed ShingleMaster Premier: Top 3% of roofing contractors in North America
- 📋 Insurance Experts: We'll handle the paperwork and adjuster coordination
- 💰 Financing Available: Even for emergency repairs
What Sets Us Apart:
- True 24/7 service: Real people answer phones, not voicemail
- Austin-based crews: We live and work in the community we serve
- Transparent pricing: Written estimates before any work begins
- Insurance advocacy: We fight for full coverage of your legitimate claim
- Lifetime workmanship warranty: We stand behind our emergency repairs
- No pressure: We inform and educate, then let you decide
Emergency Services:
- Emergency tarping and leak mitigation
- Storm damage assessment and documentation
- Insurance claim preparation and advocacy
- Same-day and after-hours permanent repairs (when weather permits)
- Interior damage coordination (we'll connect you with restoration partners)
- Financing options for unexpected repairs
Don't Wait for Disaster - Get Prepared Now
Free Preventive Roof Inspection: Even if you're not experiencing a leak, schedule a free inspection to identify potential problems before they become emergencies.
Call or Text: (512) 763-5277 Online: RippleRoofs.com/emergency Email: tx@rippleroofs.com
Available 24/7/365 - Because roof emergencies don't wait for business hours.
About Ripple Roofs
Ripple Roofs is Austin's residential and commercial roofing contractor, specializing in emergency repairs, storm damage restoration, and complete roof replacements. As a CertainTeed ShingleMaster Premier certified contractor, we combine cutting-edge technology, industry-leading warranties, and old-fashioned customer service.
Our Promise: When your roof is compromised, your home and family are vulnerable. We respond fast, work efficiently, and don't leave until you're protected. Available 24/7/365 for genuine emergencies.
Serving: Austin, Round Rock, Georgetown, Cedar Park, Pflugerville, Leander, Lakeway, Bee Cave, Dripping Springs, and all of Central Texas.
Services: Emergency Roof Repair, Storm Damage Restoration, Roof Replacement, Roof Inspections, Insurance Claims Assistance, Commercial Roofing, Gutter Installation
Contact:
- Emergency Line: (512) 763-5277 (24/7)
- Office: (512) 763-5277
- Email: tx@rippleroofs.com
- Web: RippleRoofs.com
Licensed Texas Residential Roofing Contractor | CertainTeed ShingleMaster Premier certified contractor | $1M General Liability Insurance | 5.0/5 Stars
When Emergency Strikes, Call Ripple Roofs - Austin's Trusted Emergency Roofing Partner